


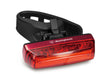
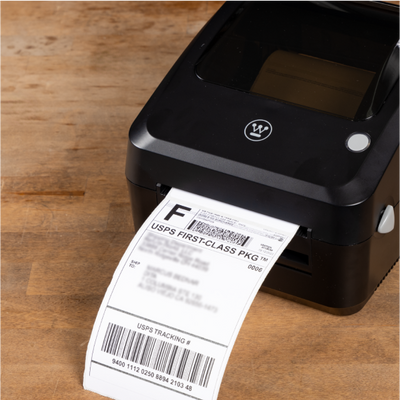
Thermal Printer WHTP203e
Download the driver to begin set up of your thermal printer.
Step 1: Connect the printer
Step 2: Download and Install Driver
Windows Driver
File Name: Westinghouse.windows.driver.2024.04.03.1
Version 1
File Size: 4.14 MB
Release Date: 2024.5.29
Supports Windows 7 (SP1), Windows 10, Windows 11 X86/X86-64 architecture 32-bit and 64-bit and Windows 10 ARM architecture 64-bit, does not support Windows XP system
Mac Driver
File Name: Westinghouse Mac driver
Version 1
File Size: 3.89 MB
Release Date: 2024.5.29
Supports macOS10.15, macOS 11.2.1, macOS 12.6.2, macOS 14.1 versions of the operating system CUPS architecture: supports intel and m1
Linux Driver
File Name: Westinghouse Linux driver
Version 1
File Size: 849 KB
Release Date: 2024.5.29
Already supported in Ubuntu kernel version: 5.15.0-91-generic, CUPS version: 2.3.1, x86_64 architecture verification
Step 3: How to use with Printing Software
Printing with Shopify
Printing with ShipStation
Printing with Pirate Ship
Printing with PayPal
How to Calibrate Printer
Download instructions here.
Paper size is not set correctly when switching to print labels of different sizes.
For Windows: Go to the Page Setup tab under Printing Preferences. Under Stock Name, select the correct size for your label.
For Mac: If your label is not printing correctly, go to Printers and Scanners and select the correct size from the drop-down menu. The default label size is 4 x 6”.
- Ensure you’re using Direct Thermal Labels. Thermal Transfer Labels are not supported with this model.
- Check label loading orientation (sticker side facing up, back of the sheet facing down).
Adjust label size settings on the platform (eBay, Amazon, UPS, etc.) to match the label size (e.g., 4x6inch)
For Windows: This is a common issue when the wrong port is selected. To fix this, you will need to clear all print jobs from the Printer Queue, then change the port to the correct one.
First, remove the print job from the Printer Queue, type ‘Printer’ in the search bar, then select ‘Printers & Scanners’. Look for the WHTP203e icon, then select “Open Queue”, select the “Printer” tab, then select “Cancel All Documents”.
Change Printer Port.
To change the Printer Port, type ‘Printer’ in the search bar, then select ‘Printers & Scanners’. Look for the WHTP203e icon, then select “Manage”, then select “Printer Properties”, then select “Ports”, then select the correct port. If there is more than one USB port, select the USB port with the highest end number. (e.g., If USB001 and USB002 are taken, select USB003).
- Check printer power, USB connection, and LED status.
- Ensure power adapter and USB cables are properly connected.
Some antivirus software or firewall settings may flag the driver as a potential risk. The drivers have been tested as safe, proceed accordingly.
Most direct thermal labels are supported, but proprietary labels may have compatibility issues. For example, Dymo Brand labels may only be supported on Dymo printers.
- Inspect and clean the printhead and rubber roller inside the printer.
- Ensure the rubber roller (Platen Roller) is clean and undamaged for optimal printing quality.
- Choose PDF file format for printing instead of PNG, JPG, or other image formats.
- If the printing is still not clear, follow the steps to increase the printing darkness/density and adjust the printing speed.
- Carbon accumulation on the print head will also cause the printed labels to be unclear.
For Windows: Type ‘Printer’ in the search bar and select ‘Printers & Scanners’.
Locate the WHTP203e icon and click on it.
Choose ‘Manage’, then ‘Printing Preferences’.
Find ‘Print Density’ and adjust as needed.
Light to Dark Density is a scale from 1-15.
Depending on the quality of the label and thickness, you may need to adjust the density/darkness accordingly.
To change the speed of the printing, go to Options, and select Print Speed. Adjust as needed.
For Mac: Under Printing Preferences, select Page Setup.
To change the darkness of the printing, go to Options, and select Printer Density. Adjust as needed. The higher the number, the darker the print.
To change the speed of the printing, go to Options, and select Print Speed. Adjust as needed.
Download installation instructions here.
Need Assistance?
Need remote support? Click below to get access to TeamViewer remote support.